Hey everyone, it’s Mia here from Perimeter Fencing – and if you’ve already installed one of our vinyl perimeter fences, you know how good that investment feels. No rusting, no chipping, none of the endless upkeep that comes with wood or metal fences, right? But here’s the thing: even vinyl doesn’t stay perfect on its own. I see way too many people buy a top-tier fence, then ignore it for years, only to wonder why it’s looking dull, or getting tiny cracks, or even leaning a little. That’s why I’m putting together this quick, no-jargon guide to keeping your vinyl fence looking brand new for decades – no fancy tools or weekly marathons required. Let’s dive in. Perimeter Fencing
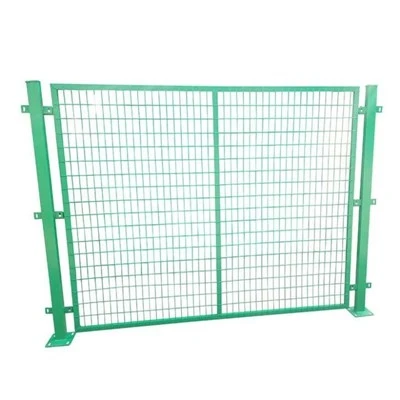
First off, let’s get one myth out of the way: vinyl is plastic, yeah, but it’s not indestructible. Our fences are made with UV-stabilized resin for outdoor use, and we test every panel to stand up to rain, snow, and sun, but that stuff works best if you give it basic care twice a year. I know life’s busy – that’s why I’m breaking this down into super simple steps, most of which take 15 minutes or less when you knock them out at the right time.
Let’s start with the most basic thing people skip: regular cleaning. I’m not talking about a full power wash every month – that’s actually bad if you do it too hard, trust me. Dirt, pollen, mildew, and that weird green grime from moss or mold build up on the rails and pickets over time, and if you leave it, it can etch into the vinyl or break down the UV layer. What’s the right way to clean it? Grab a few supplies: a soft bristle brush (like the kind you use for your car, not a stiff scrub brush that could scratch), a bucket of warm water, and a gentle dish soap (Dawn works great, no need for fancy vinyl-specific cleaners). Avoid bleach and harsh chemicals – they can make the vinyl fade unevenly, and they’re bad for the grass and plants around your fence, too.
Here’s my pro tip: do this every spring. Winter can bring road salt (if you live in a colder area), snow melt, and all that grime that blows in off the streets. Spring cleaning for your fence takes care of all that before it sets in. Just mix a capful of dish soap into the warm water, scrub the pickets and rails lightly, then rinse with a garden hose on low pressure. If you have stubborn mildew or that black spot stuff, add a little white vinegar to the mix – one cup per gallon of water does the trick, no bleach needed. And for the love of all things clean, don’t use a pressure washer. I see people do this all the time, blasting their fence to get it done fast, and by the end, they’ve got water seeping under the vinyl caps, or even pushing the pickets out of the posts. If you must use a pressure washer (only for super caked-on gunk, maybe once a year max), keep it at less than 1500 PSI, hold it at least 12 inches away from the surface, and keep it moving – don’t linger in one spot. That’s the easiest way to damage the fence.
Next up: inspect for small damage before it becomes a big problem. This is the part that takes like 5 minutes every two months, and it saves you from replacing an entire panel later. Walk your fence line at least twice a year – after a big storm, and at the start of summer if you live in a hot area, or start of fall if you get heavy snow. What are you looking for? Tiny cracks in the pickets or rails, loose posts, misaligned panels, or little gaps where the vinyl has pulled away from the hardware.
Wait, what about those tiny surface cracks I mentioned? A lot of people panic when they see those, especially on older vinyl, but most of the time, they’re just “stress cracks” from temperature changes – vinyl expands and contracts, right? It’s normal for small, hairline cracks to form over time, especially in areas with big swings between hot days and cold nights. The key is to fix those small ones before dirt and water get in and make them worse. Don’t use caulk for cracks, by the way – that’s not meant for vinyl. Our go-to fix for small cracks is a vinyl repair kit, which you can pick up at any hardware store for like $10. Just follow the directions, and it seals the crack so it doesn’t get bigger. If the crack is longer than an inch, or goes all the way through the picket, that’s when you’ll want to replace that individual part, not the whole fence. That’s the beauty of vinyl – it’s modular, so you don’t have to tear out the whole thing over one broken picket.
Then there’s leaning posts. This is usually from ground settling, or a big storm, or even a snow load if you had a lot of heavy wet snow. If you catch it early, it’s super easy to fix without replacing the post. First, lean the fence back straight, then take a few bags of gravel and pile it around the base of the post. Wait, not dirt – dirt compacts over time, but gravel stays firm, so it keeps the post upright. If the post is really loose, you can also add a few shims between the post and the gravel hole to hold it in place. Don’t just tamp dirt around it – that’s a common mistake, and within a year, the dirt will shift and the post will lean again.
Now, let’s talk about seasonal stuff, because maintenance changes a little depending on where you live. If you’re in a place with four distinct seasons, like most of the US, here’s my seasonal checklist:
Spring: Do the deep clean I told you about. Check for any winter damage – road salt can corrode the metal hardware (the screws, brackets that hold the fence together) so give those a quick wipe with a dry cloth too, if you see any salt build up. If you had ice or snow piled against the fence all winter, make sure you move any mulch or plants back from the base so air can circulate – that prevents mold growing on the bottom of the pickets.
Summer: Do a quick mid-season check. Especially if you get a lot of rain or humidity, keep an eye out for mildew. A quick wipe with that vinegar-water mix takes care of that before it spreads. Also, if you have any lawn sprinklers hitting the fence all day, that’s not a huge problem, but make sure you don’t use a fertilizer with weed killer on the grass right next to the fence – overspray can discolor vinyl.
Fall: This is prep for winter. Clear any leaves, branches, or debris that’s piled against the fence – wet leaves sitting on vinyl can cause stains and mildew, plus they can hold moisture against the posts which leads to rot (wait, vinyl posts won’t rot, but the metal hardware around them can rust). If you live in a cold area, check your drainage around the fence – if water pools at the base of the posts in the fall, it can freeze and expand, pushing posts out of alignment. Make sure the ground slopes away from the fence line, not towards it.
Winter: If you get snow, never use a metal shovel or ice scraper on your fence to remove snow or ice. Metal can scratch the vinyl, and if you hit hard, you can crack a picket. Use a plastic shovel, and gently brush off snow instead of piling it up against the fence. Road salt is the biggest winter enemy for vinyl fence hardware – if you have salt on the roads near your fence, give the posts and hardware a quick rinse with fresh water a few days after a snowstorm, to get the salt off before it can eat through the screws or brackets.
Wait, what about things that people do that they shouldn’t? Let’s cover those too, because I get asked about this all the time. First, no painting your vinyl fence. Yeah, I know, you want to change the color, but regular paint doesn’t stick to vinyl well, and it will peel, crack, and look way worse than the original color. There is vinyl-specific paint, but it’s expensive, and most people end up hating it a year later. If you want a different color, just replace the pickets – it’s way cheaper than painting, and you get a seamless look.
Second, don’t attach heavy things to the fence that it’s not meant for. Our perimeter fences are built to keep kids, pets, and property secure, but they’re not playground equipment. Don’t hang a swing set from the rails, or a heavy bike rack that holds more than two bikes, or a bird feeder that’s really big. That can pull the rails out of alignment, or even bend or break them. If you need extra storage or things hung, add a separate trellis or a pole anchored into the ground next to the fence – that’s way safer for your fence.
Third, don’t use abrasive cleaning tools. I mentioned this earlier, but it’s worth repeating. Steel wool, stiff wire brushes, scouring pads – all of these will scratch the vinyl’s surface, and once the UV layer is scratched off, the vinyl will fade unevenly. Stick to soft brushes, sponges, and gentle cleaners.
Now, the big question: how often do you actually need to do this stuff? If you live in a mild, dry area (like parts of California or Arizona), you can get away with the deep clean once a year, and quick inspections twice a year. If you live in a place with heavy rain, snow, or high humidity (like the Pacific Northwest or Southeast US), you’ll want to do the deep clean twice a year, and inspections every three months. I’ve had customers who’ve had our fences for 15 years, and they still look almost new, because they follow these simple steps. The ones that call me complaining about their fence looking old? 9 times out of 10, they skipped the cleaning and inspections.
Wait, let’s also touch on warranty stuff, because that’s a big one for our customers. Our vinyl perimeter fences come with a 20-year warranty against fading and cracking, but that warranty is void if you don’t do basic maintenance. It’s not that we’re being strict – we just want you to get the most out of your investment. Following these steps keeps the fence looking good, and it keeps the warranty valid. That’s a win-win, right?
Let me wrap this up with a few quick final tips that I always tell new customers. First, store any vinyl cleaner or repair kits in a cool, dry place – never leave them in the sun, because that can make them go bad. Second, if you have questions about a specific part of your fence, just reach out – our team is always here to help, no matter how small the problem is. Third, don’t wait for damage to get worse before fixing it – a 2-minute repair for a tiny crack is way cheaper and easier than replacing an entire picket later.
At the end of the day, a vinyl perimeter fence is one of the best investments you can make for your home – it’s durable, low-maintenance, and way better than wood or metal in the long run. But even the best fence needs a little TLC to keep it looking great and working well for years. If you’re still in the market for a new fence, or you have an old fence that’s seen better days and needs a replacement, we’d love to chat with you. We can help you pick the right style for your property, give you more tips tailored to your local climate, and make sure your fence is installed correctly so maintenance is a breeze.

Thanks for reading, everyone. Drop a comment below if you have any questions, or just hit up our team to talk through your fence needs. Here’s to keeping your perimeter fence in top shape!
Steel Grating References:
- Vinyl Institute. (2022). Maintenance Guidelines for Vinyl Fencing. Retrieved from industry technical resources for polymer fencing materials.
- American Fence Association. (2021). Seasonal Care Tips for Residential Perimeter Fences. Annual industry guide for fence property upkeep.
- University of California Agriculture and Natural Resources. (2020). Cleaning and Maintaining Outdoor Vinyl Surfaces. Cooperative Extension publication for residential landscape maintenance.
- International Code Council. (2019). Residential Fence Installation and Maintenance Standards. Code-aligned guidelines for fence durability and upkeep.
Hengshui Anbang Road and Bridge Material Co., Ltd.
As one of the most professional perimeter fencingmanufacturers and suppliers in China, we’re featured by quality products and good service. Please rest assured to wholesale bulk customized perimeter fencing from our factory. For pricelist, contact us now.
Address: Zhaobazhuang Wire Mesh Industrial Park, Shenzhou City, Hengshui City, Hebei Province
E-mail: 857732879@qq.com
WebSite: https://www.cnanbang.com/
